sudo mysqldump -l -u root -p --add-drop-table cacti > mysql.cacti
cp /Library/WebServer/Documents/cacti-0.8.7e/include/config.php /Library/WebServer/Documents/cacti-0.8.7f/include/
rsync -av /Library/WebServer/Documents/cacti-0.8.7e/scripts/* /Library/WebServer/Documents/cacti-0.8.7f/scripts
rsync -av /Library/WebServer/Documents/cacti-0.8.7e/resource/* /Library/WebServer/Documents/cacti-0.8.7f/resource
rsync -av /Library/WebServer/Documents/cacti-0.8.7e/rra/* /Library/WebServer/Documents/cacti-0.8.7f/rra
ln -s cacti-0.8.7f cacti
Podcast Producer Custom YAML file for email notifications
Friday, April 23, 2010 2 comments
1. Create a simple bash script to create a .yaml file
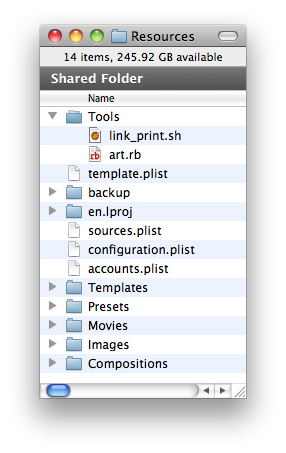
2. Place the script in the Tools directory
3. Create a new workflow shell action to call the script
4. Call the generated .yaml from from the mail notify action
#!/bin/sh
filename=${1}
outfile=${2}
echo --- > "${outfile}"
echo :type: upload >> "${outfile}"
echo :destination:'\n' - rtsp://qtss.someschool.edu/dir/subdir/"${filename}" >> "${outfile}"
2. Place the script in the Tools directory
3. Create a new workflow shell action to call the script
<key>rtsp-link-yaml</key>
<dict>
<key>arguments</key>
<array>
<string>shell</string>
<string>--prb=$$GLOBAL::Library Bundle Path$$</string>
<string>--</string>
<string>$$Workflow Resource Path$$/Tools/link_print.sh</string>
<string>$$SOURCE::0::Filename$$</string>
<string>rtsp_link.yaml</string>
</array>
<key>command</key>
<string>/usr/bin/pcastaction</string>
<key>dependsOnTasks</key>
<array>
<string>preflight</string>
</array>
</dict>
4. Call the generated .yaml from from the mail notify action
<key>notify-plugin-email-af6a64ff8bf7e69a70af820cea17c182</key>
<dict>
<key>arguments</key>
<array>
<string>mail</string>
<string>--prb=$$GLOBAL::Library Bundle Path$$</string>
<string>--smtp_server=$$SMTP Server$$</string>
<string>--from=pcastadmin@someschool.edu</string>
<string>--pmu=$$GLOBAL::Workflow Resource Path$$/Templates/email.pmu</string>
<string>--no_fail</string>
<string>--to=$$GLOBAL::Administrator Email Address$$</string>
<string>--to=$$GLOBAL::User Email Address$$</string>
<string>--publish_info=rtsp_link.yaml</string>
</array>
<key>command</key>
<string>/usr/bin/pcastaction</string>
<key>dependsOnTasks</key>
<array>
<string>upload-to-cunix</string>
</array>
</dict>
</plist>
5. Resulting email:

Podcast Producer Custom SFTP Upload Workflow
Thursday, April 22, 2010 0 comments
I built a Custom workflow for publishing files generated from other workflows or as a simple stand alone SFTP uploader. Podcast Composer does contain file transfer publish options but the GUI options are limited. For instance it does not allow for setting file permissions

First Step
Copied the upload_to_transcription_service.rb and renamed it to upload_to_unix.rb. removed unneeded pieces of the code and added chmod.
Second step
Created a basic workflow with podcast capture and then edited the template.
<key>upload-to-cunix</key>
<dict>
<key>arguments</key>
<array>
<string>shell</string>
<string>--prb=$$GLOBAL::Library Bundle Path$$</string>
<string>--</string>
<string>$$Workflow Resource Path$$/Tools/upload_to_cunix.rb</string>
<string>$$SOURCE::0::Filename$$</string>
<string>$$SFTP CUNIX$$</string>
<string>$$SFTP CUNIX Folder path 2010$$</string>
<string>$$SFTP CUNIX Username$$</string>
<string>$$Global Resource Path$$/id_rsa</string>
</array>
<key>command</key>
<string>/usr/bin/pcastaction</string>
<key>dependsOnTasks</key>
<array>
<string>preflight</string>
</array>
</dict>

I searched around on the web for SFTP upload examples but found none that did exactly what I wanted. I did find that Apple posted this tutorial which includes a ruby script that uses SFTP to publish files for a transcription service. I downloaded the example workflow from http://connect.apple.com and the edited files I needed to suit my needs.
First Step
Copied the upload_to_transcription_service.rb and renamed it to upload_to_unix.rb. removed unneeded pieces of the code and added chmod.
sftp.setstat(movie_destination_path, :permissions => 0664)Second step
Created a basic workflow with podcast capture and then edited the template.
<key>upload-to-cunix</key>
<dict>
<key>arguments</key>
<array>
<string>shell</string>
<string>--prb=$$GLOBAL::Library Bundle Path$$</string>
<string>--</string>
<string>$$Workflow Resource Path$$/Tools/upload_to_cunix.rb</string>
<string>$$SOURCE::0::Filename$$</string>
<string>$$SFTP CUNIX$$</string>
<string>$$SFTP CUNIX Folder path 2010$$</string>
<string>$$SFTP CUNIX Username$$</string>
<string>$$Global Resource Path$$/id_rsa</string>
</array>
<key>command</key>
<string>/usr/bin/pcastaction</string>
<key>dependsOnTasks</key>
<array>
<string>preflight</string>
</array>
</dict>
Using Handbrake in a Podcast Producer 2 Workflow
Monday, April 12, 2010 1 comments
Following the instructions posted at the podcastproducer.org website this is how I did it:
<key>export-plugin-handbrake-9d5ebe0719a96619aab2174ee01bb8b0-encode</key>
<dict>
<key>arguments</key>
<array>
<string>shell</string>
<string>--basedir=$$Base Directory$$</string>
<string>--</string>
<string>$$GLOBAL::Workflow Resource Path$$/Tools/HandBreaker</string>
<string>$$GLOBAL::Library Bundle Path$$/Contents/Resources/Working</string>
<string>edit-core-master.mov</string>
<string>export-plugin-handbrake-4904012a49adfecb2ef9c0a443efca19.mp4</string>
<string>$$GLOBAL::Workflow Resource Path$$/Tools/HandBrakeCLI</string>
</array>
This calls the HandBrakeCLI binary from the Tools directory and a bash script that runs it with switches:
#!/bin/sh
basedir=${1}
infile=${2}
outfile=${3}
HandBrakeCLI=${4}
MAX_WIDTH='480'
ENCODER='x264'
FRAMERATE='29.97'
DEINTERLACE='--deinterlace="-1"'
VIDEO_BIT_RATE='450'
FORMAT="mp4"
"${HandBrakeCLI}" -i "${basedir}/${infile}" -o "${basedir}/${outfile}" \
${DEINTERLACE} -e ${ENCODER} -b ${VIDEO_BIT_RATE} -2 --turbo -O -I -f ${FORMAT} -r ${FRAMERATE} -a 1 -E faac -B 64 -6 dpl2 -R 48 -D 0.0 -X ${MAX_WIDTH} -m -x \
cabac=0:ref=5:me=umh:bframes=0:subme=6:8x8dct=0:trellis=0:analyse=all -v
Subscribe to:
Posts (Atom)